From my perspective one of the more difficult clinical procedures to manage is the smile makeover. It’s not they are hard technically, but instead that you REALLY have to manage the patient expectations.
In the beginning, I did these cases analog. Take PVS impressions, send it to the lab, and pray that it comes back looking like I want.
Then I learned from master cosmetic experts and added the art of a aesthetic waxup, the prototype provisionals, and photograph communication. These cases become more predictable.
But still there was some missing pieces. Shade communication, lab communication, and patient communication.
That’s where digital dentistry has stepped in and made life much better. Let’s take a closer look from my very first smile makeover done using CEREC Connect way back in 2009.
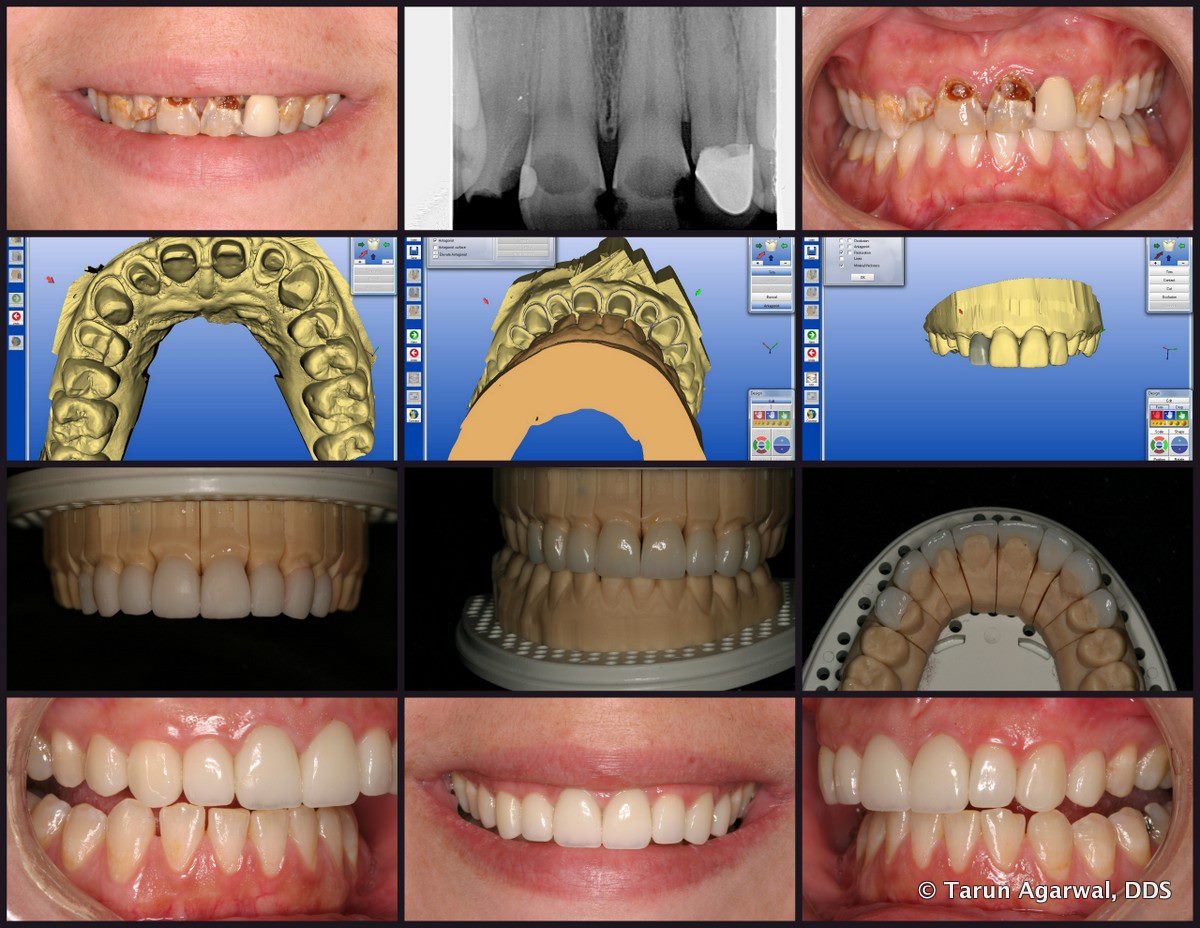
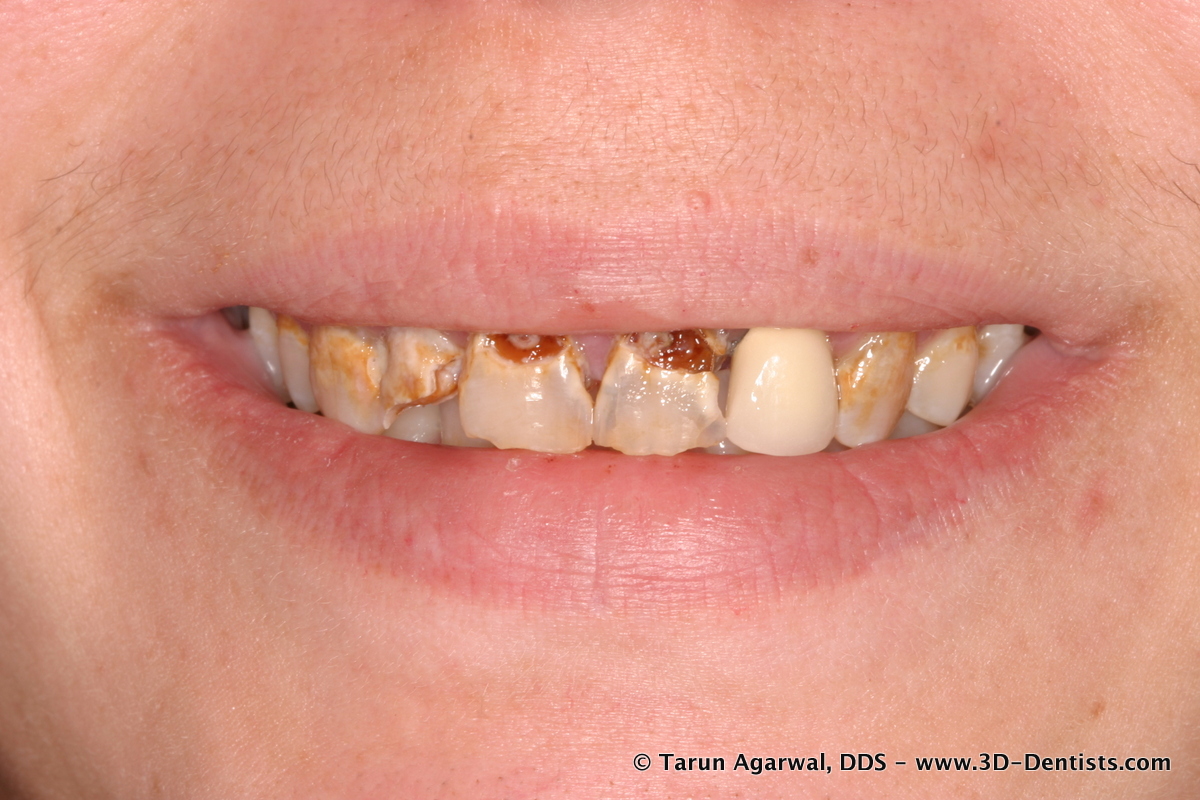
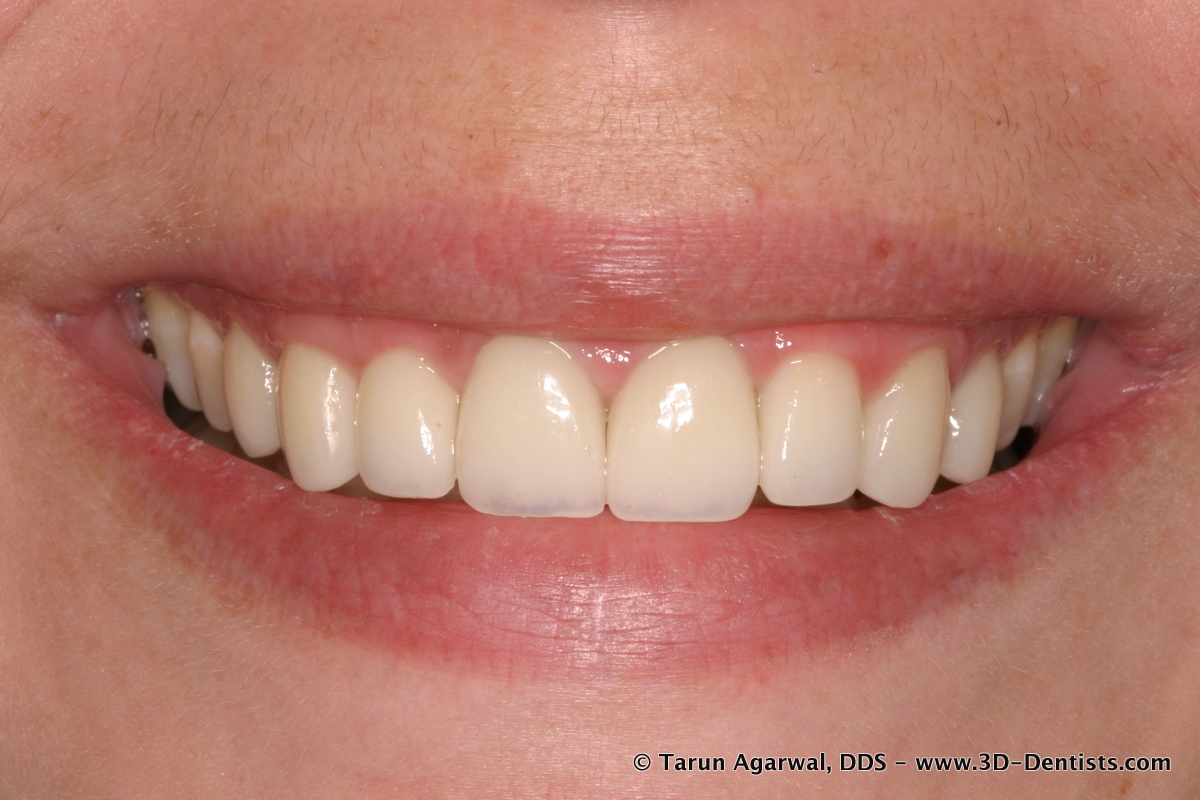
Jennifer came to our office looking to enhance her smile. As you can see she was in pretty bad shape.
So we did everything normal to begin with. We did some foundational dentistry to get her back into shape (this was foundation fillings and hygiene and endo). Then several months later we proceeded to move towards definitive restorations.
Instead of taking a PVS impression, we took a digital impression. These impressions were taken using the CEREC BlueCam. Today, we would be doing this with CEREC OmniCam.
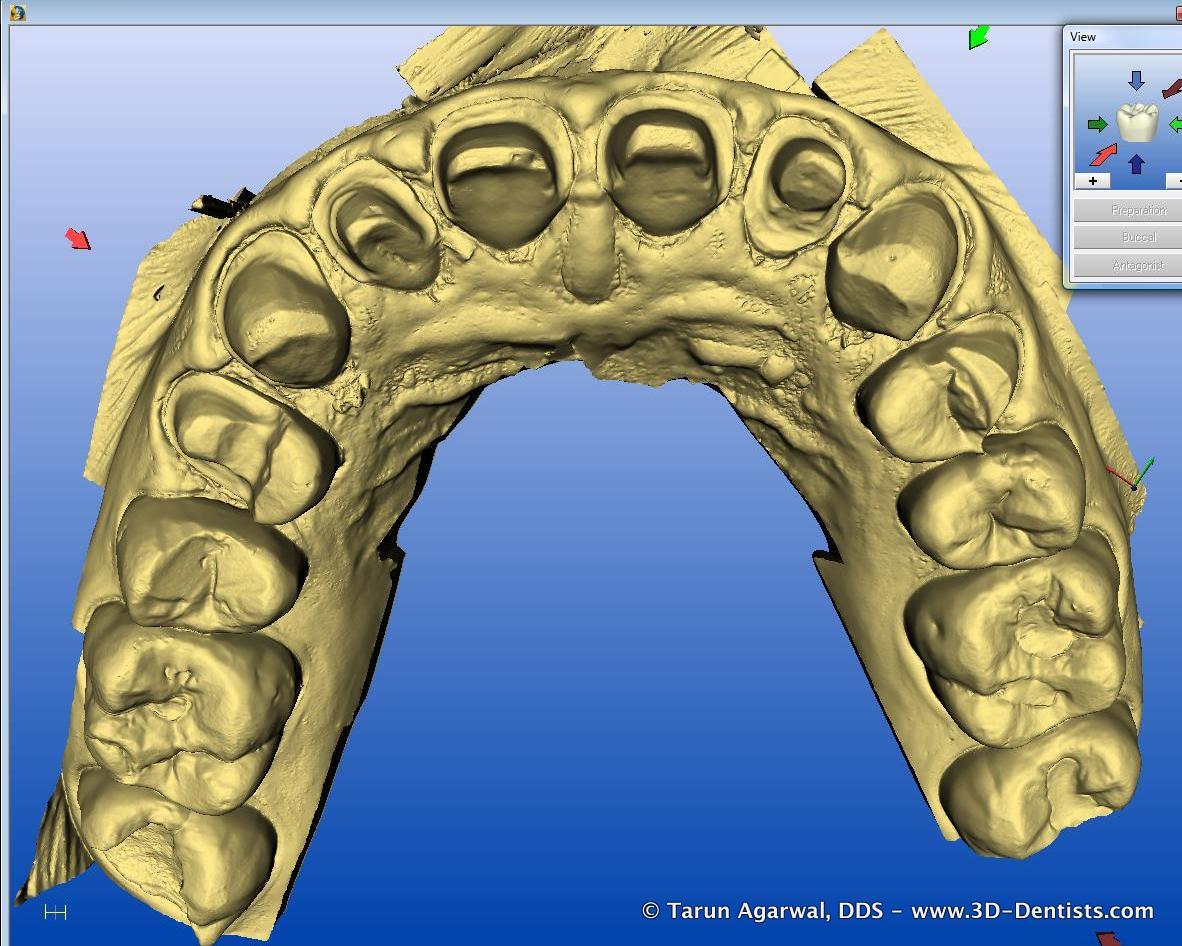
The big benefit in this case is that my laboratory is able to ‘login’ with me and verify my preparations while the patient is in the chair.
Traditional dentistry would require you to send the impressions to the lab and hope everything was satisfactory. Here the lab can double check and have me make any corrections right away.
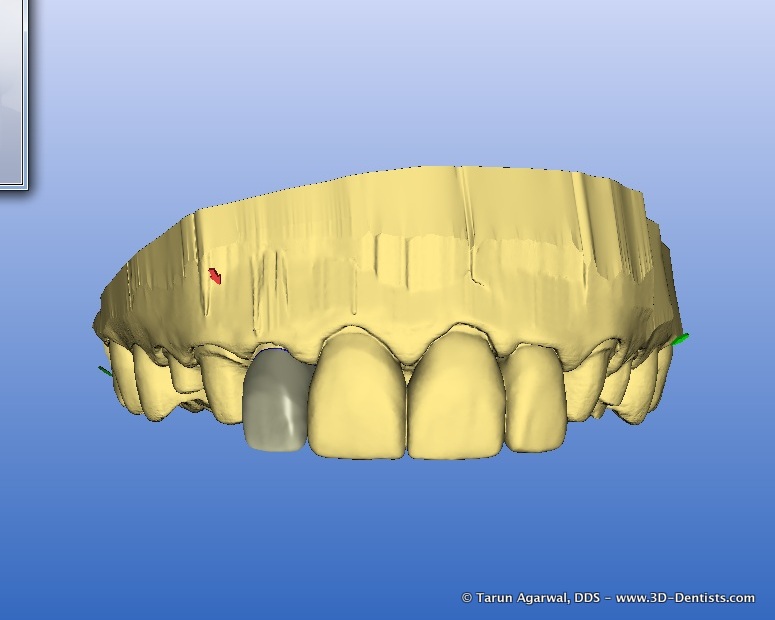
Now here is where the real magic happens, in my opinion. The laboratory (being digital as well) can now communicate back to me.
I will actually approve my case in each step.
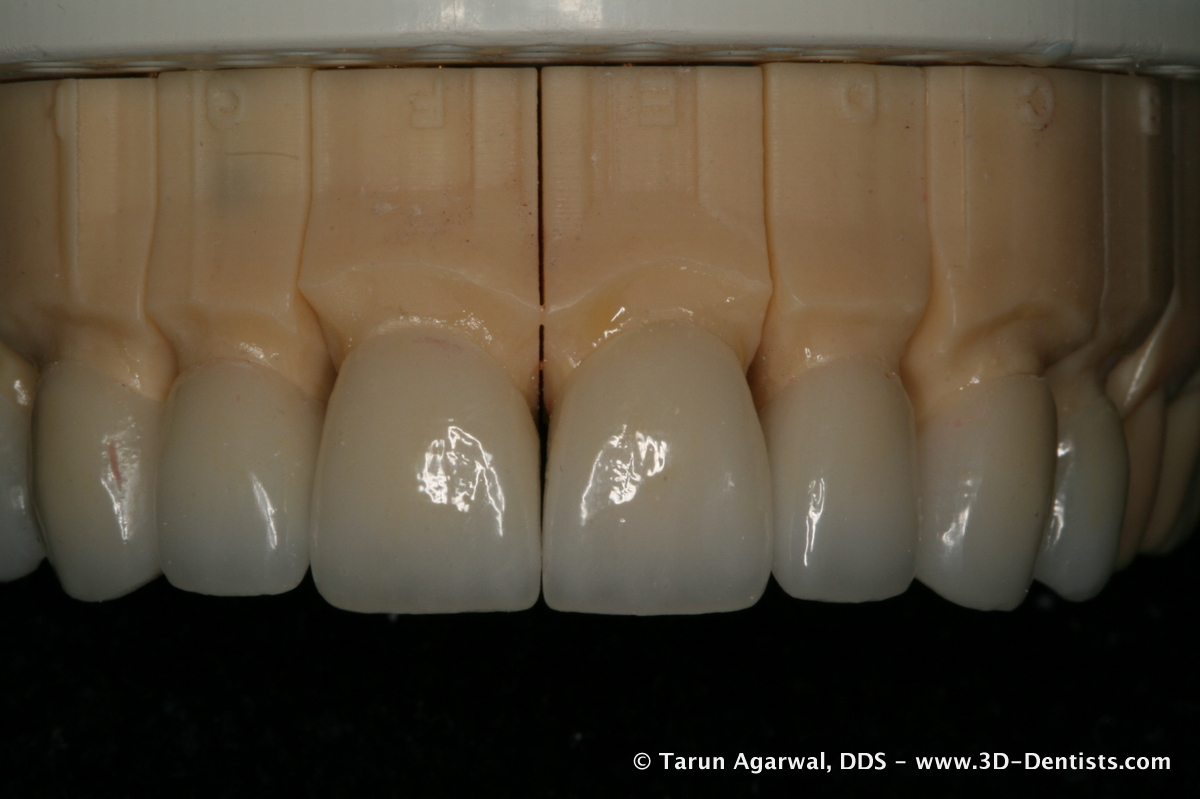
The initial design. At this point if I don’t like the anatomy, contours, or shape we can correct before we get to far along.
The immediate mill. Again, if something is not to my like (or my patients likeing – more on that later) we can correct immediately. Maybe it is too square? or to round?
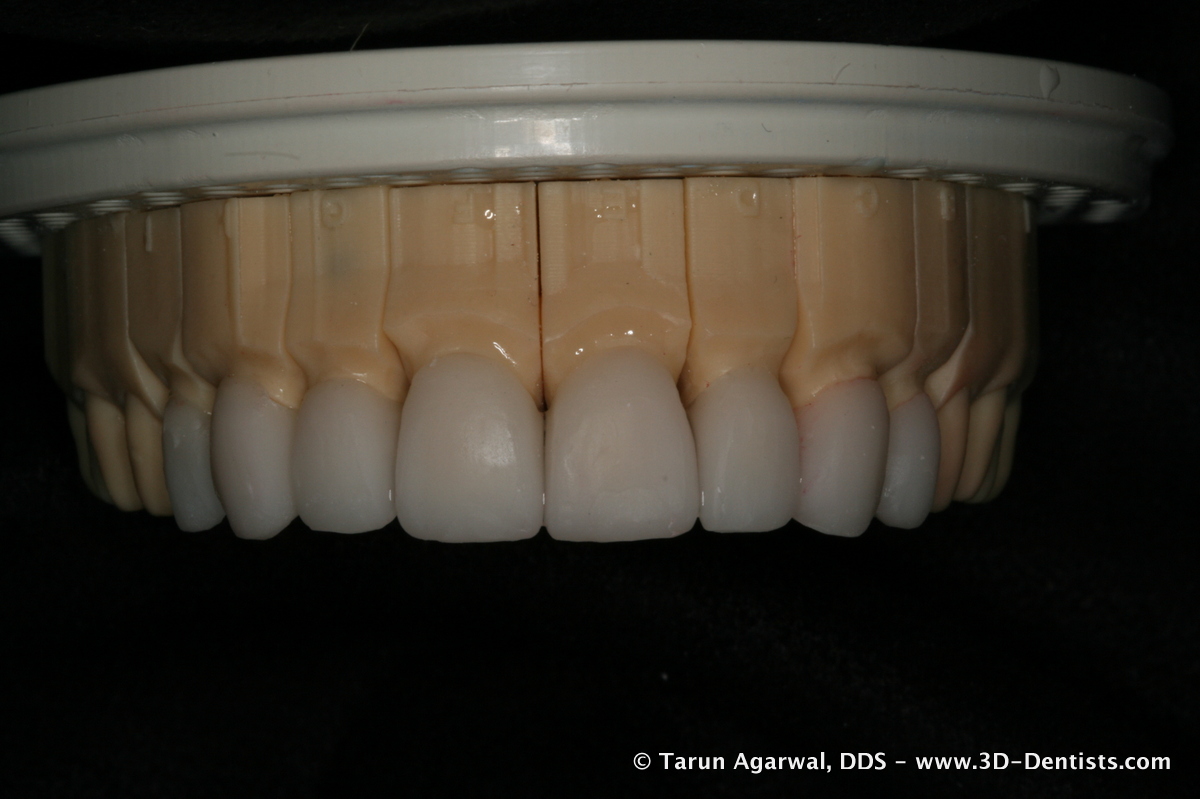
Then post characterization. Maybe there is too much chroma in the gingival third? Maybe there is not enough translucency?
Now let me ask you this. I think the above looks great. But have you ever thought something looked great and then went to deliver and the patient hate it? I know I have.
So instead of just keeping these photos and communication to myself, I also share these with the patient. I like to get their input in the process.
90% of the time they just go along, but at least they are involved. They recognize me as being different, very thorough, and worth the extra fee (not that I really charge enough anyways).
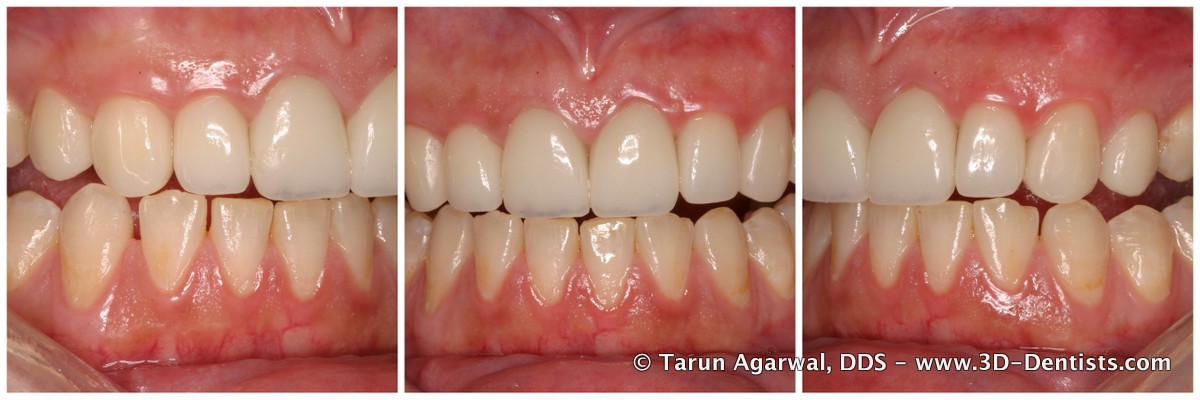
Now when it comes to delivery the real focus is fit and function. They case is pretty much ‘pre-approved’ by the patient and myself.
And for those of you who worry about function and digital. Let me tell you that digital allows articulation and all that stuff.
So there you have it. A great application for digital dentistry that you don’t use everyday, but when you need it, it’s worth its weight in gold.
How are you using digital dentistry to make your life easier and improve clinical outcomes? Share you thoughts in the comments section below.