As a CEREC user we understand the importance of preparation to creating long lasting restorations. A proper preparation makes marking the margin easier, makes design easier, and ensures enough reduction for material strength.
I wanted to take an opportunity to outline my step by step method of crown preparation.
Here is a photo of the basic burs that I use for a crown prep. Essentially it’s 3 burs – occlusal depth reduction bur, coarse rough prep bur, and a fine diamond to finalize the prep.

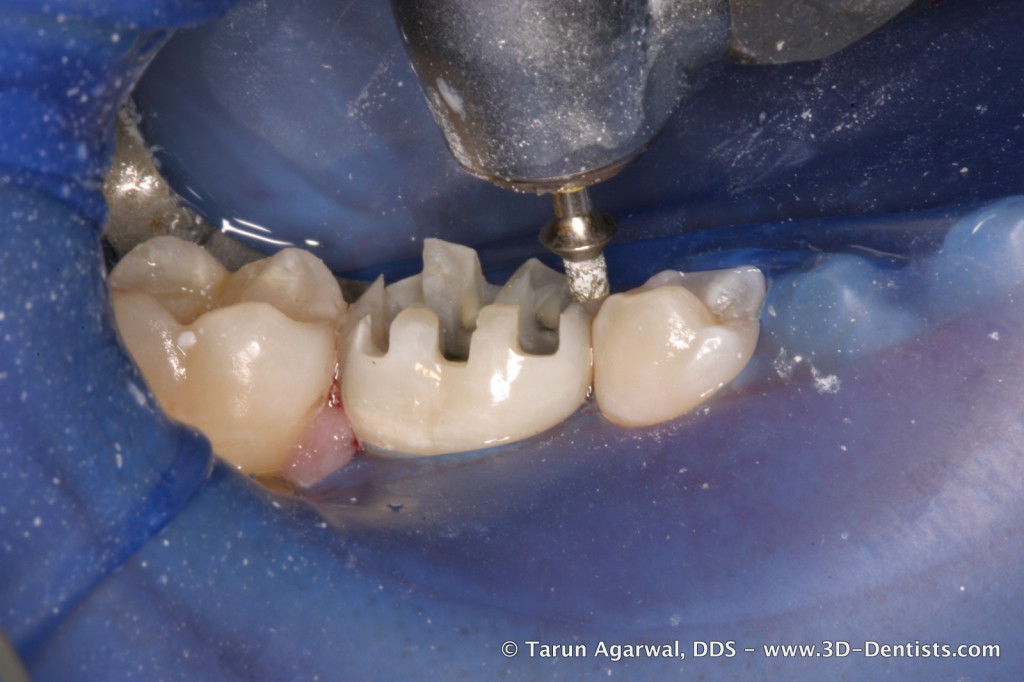
Step 1. Using the occlusal reduction bur cut grooves through the entire occlusal surface. This will ensure a uniform minimum reduction. I recommend the use of a 2.0mm depth reduction bur.

Step 2. Using your thin coarse diamond go ahead and cut away the mesial and distal interproximal. Take your time to avoid dinging the neighboring tooth.

Step 3. Using the same thin coarse diamond go ahead and reduce the occlusal depth grooves.

Step 4. Use the coarse diamond to make facial depth cuts. This bur is 1.4mm in width and burying it a bit more than half way will ensure a 1.0mm axial reduction. The rough prep is then completed.

Step 5. Using the fine diamond go ahead and idealize your margin and smooth your preparation. A smooth preparation leads to better milling and fit. The fine diamond is an 856-021 which means the thickness is 2.1mm. Using a thicker fine diamond allows me to get a 1.0mm chamfer margin.

An extra tip…. We utilize electric hand pieces in our office. When finalizing our margin I go to 50% speed and I have full control over location and thickness of margin.
*** It is my preference to use disposable diamonds exclusively. One, it ensures a sharp cutting instrument which will reduce chatter and heat generation. Secondly, it is hygienic and clean. Currently (as of August 2014) I am utilizing Microcopy disposable diamonds.

